Sunday, August 21, 2011

Family Dinner

Last week, I was visiting my Aunt and Uncle in Dutchess County (upstate New York), and since my sister and her husband were there, as well, we thought a family dinner would be fun.  My sister happens to be a vegetarian (I know...  how could I have a sister who is a vegetarian?), so besides some good Rib Eye steaks, we had lots of vegetable dishes.

There are some upsides to having a vegetarian sister:  the most obvious, more meat for everyone else! The other, she comes armed with great vegetable recipes.  So aside from the shopping, this whole meal only took about 40 minutes to prepare.  

Here was the menu:

Rib Eye Steaks:
Aunt Dana ordered steaks from her local butcher.  They were two inches thick and nicely trimmed.  I let them come up to room temperature and gave them the standard Olive Oil, (sea) salt, and freshly ground pepper.  Since these steaks were thick, I used a lot of seasoning.  In the video, I mention 7 minutes per side, but 14 minutes ended up being a bit too long.  The grill was very hot, so I only cooked the steaks for a total of 11 minutes (six minutes on the first side and 5 on the other).

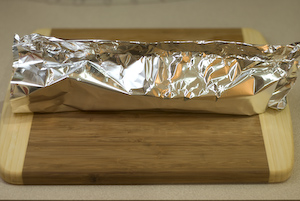
How did I know when to take the steaks off for a perfect medium rare?  Here is how I knew. This takes some practice.  Alternatively, use a thermometer.  When the center of a steak get to 110 degrees (this only applies to steaks), take it off! Put the steak on a dish and cover it with foil, and let the meat re-distribute its juices for 10 minutes.  The meat will continue to cook and will end up about 125 degrees.  That's a perfect medium rare.  

Note: anything coming off the grill should rest for at least 10 minutes after it is done cooking.  The juice in the meat is re-distributed during that time, and when the meat is sliced, it will retain most of its juice.  No dried out food!

Corn on the Cob:
Last week was peak corn season in Dutchess County.  This recipe is only for corn in peak season.  If you try this with early season corn or frozen corn, it's not going to be good.  Since I'm not a huge corn fan, peak season corn is the only kind I will eat.  Any other time of year, I just skip it.  Peak season corn is very sweet and sugar caramelizes on the grill, so the taste is great.

Uncle Ira was in charge of corn, which was picked that morning.  He shucked the corn and put it on the grill, then he rotated the corn around a few times--starting directly on the burners and then moving them up to the warming rack to caramelize a bit.  Total grill time is about 25 minutes.   Put the corn in a dish and cover with foil.  They will stay hot for about 30 minutes.  That's it!  Moral of the story: Work with fresh local ingredients that are in season, and things are simple.  Nothing fancy required here.  If you can't find peak season corn, there are plenty of other good vegetable side dishes to make.


This stuff is like couscous or rice, but way better!  Just try it.  Have I steered you wrong yet?


Ashish's Smoked Eggplant - This stole the show in my opinion

Who is Ashish? He is my sister husband and a recent and welcome addition to our family.  My kids call him Uncle Ashish. Uncle Ashish showed me how to smoke (grill really, we did not use smoke) eggplant.  Let me tell you, this is worth making. 


Try these out!  Let me know how it goes.  Send me any questions you have to lneffron@gmail.com.


Sunday, August 14, 2011

Pulled Pork BBQ

I'm having a party and I want to wow my guests.  To do so, I'm willing to invest most of a day smoking meat, but I also want to hang out it the yard and drink beer with Rocco.  So... I'll be making Pulled Pork BBQ.  This is a serious undertaking and it's not for the faint of heart, but it's well worth the effort.  Everyone loves this stuff.  It's great for a party and the last time I made it was for my daughter's 5th birthday.

For those of you that have been keeping up with my previous posts, we'll see what your chops are made of with this new recipe!

Here's your timeline:

The day before your party, pick up the pork shoulder.  This may also be called Boston Butt (I'm not sure why, but if you know, please leave a comment).  I've also seen it called a picnic shoulder, but only at crappy low end grocery stores.  Let's steer clear of those. Rub the pork with....  you guessed it...  Magic Dust.  Saran Wrap the pork and refrigerate overnight.

10 hours before you want to eat, soak you chips and start your coals.  This will  ideally be done in a smoker, which is almost as good is a charcoal grill, but can also be done on a gas grill if need be.  If you plan to do this in the oven, in a pressure cooker ,or in a slow cooker, you are not making Pulled Pork BBQ. You are making pulled pork.  That kind of sucks, and if you're having a party, your friends deserve better. Take the meat out of the fridge and let it start to come to room temperature.

9 hours before you want to eat, start smoking.  If you have a smoker, get it to 275 degrees and figure the meat will cook for eight hours.  Note: if you are using a charcoal or gas grill, it will be hard to keep the temperature that low so the meat won't take eight hours to cook.  Figure 7-8 hours for your cook time.

Note: place a drip pan under the pork (under the grate) and pour a beer into it, to help keep things moist.

As the smoke tapers off (every 60 minutes or so), add more smoking chips.

5 hours before you want to eat, start checking the internal temperature of the meat.  The first milestone will be 175 degrees.  This is the temperature when the meat will be done absorbing smoke and will begin to dry out.

Once you reach 175 degrees wrap the pork in two layers of heave duty aluminum foil.  Take some of the juices in the drip pan and pour them over the pork and wrap the juices up with the meat. Do a good job wrapping so nothing leaks out. Return the pork to the smoker and continue cooking to 200 degrees.  During the last 25 degrees of cooking is when the connective tissue breaks down and the pork begins to fall apart (becomes pullable).

Remove the pork from the smoker, unwrap it and let is rest for 30-60 minutes before you want to eat. Start warming your BBQ sauce on the stove.

30 minutes before you want to eat, pull your pork. You can use two forks which is a pain in the ass.  Or you can use rubber gloves.  I use these.  You can also buy gloves like these at the hardware store.  They are cheap and really easy to clean.  Just wear them and wash your hands in the sink when you are done.

Next, add BBQ sauce to the pulled pork.  How much?  Go with your gut!  But not too much!  Don't drown the pork.  The taste of the meat and the smoke should be the predomninant flavor.  The taste of the sauce should be secondary.

Mix your sauce in and cover the pan to keep warm.  I put the covered pan onto the smoker to keep warm or to heat it back up.  Sometimes I use the oven if the smoker has cooled considerably.

What kind of BBQ sauce?


This is a long involved question that I will cover in the near future.  There are so many kinds of sauce.  Most of the time I make one red BBQ sauce (tomato based) and one white (vinegar based).  Then everyone at the party argues which sauce is better.  Kind of like the old "Tastes great / Less filling" commercials.  But the key is that I MAKE THE SAUCE.

BBQ sauce is one of those things that tastes much different when it is made fresh.  It makes a big difference.  However, I realize this whole ordeal has been a tremendous burden already, so I will share with you my favorite store bought sauce.  It comes from one of my favorite BBQ restaurants, Dinosaur BBQ.  I can get this sauce at my local market.  If you can't, order some, and keep it in the cupboard, for all sorts of applications.

Use the store bought sauce to get started.  I will also post at white (vinegar-based) sauce recipe at the bottom of the blog.  That takes 5 minutes to make, so just do it; you've come this far, don't ruin your Pulled Pork BBQ now!

Have your guests load the pulled pork onto thick white bread, top with Slaw (recipe at bottom of blog), and make a sandwich.

Good luck!  No mater how this comes out, you will have the respect and appreciation from your guests for making the effort to do it right.

The video below is from the birthday party.  There is a shot of C'est Cheese, my mac and cheese recipe, which, like all the others, can be found at the bottom of the blog.


Sunday, August 7, 2011

Thunder Thighs

Here is an easy way to BBQ some food to keep in the fridge all week.  If you're like me, I love to cook on the weekends, but I have very little time after work.  After a long commute from NYC, the last thing I want to do is come home and start cooking something complicated.  So, I make lots of food on the weekends and we usually eat the leftovers for several days. 

Not all food is good for leftovers; Thunder Thighs are.  Chicken thighs are quick and simple to make.  It's hard to dry them out, they easily absorb smoke, and those are both key factors that make them great for the grill.  Not to mention they are cheap and usually readily available.

Here's a summary of the video:

1. Soak some wood chips in water.  I like Jack Daniels smoking chips for this recipe.
2.Generously season the thighs with Magic Dust (my "go to" dry rub), and some olive oil.
3.Smoke the thighs for about 30 minutes. I usually aim for 175 degrees, just to be on the safe side.  Don't worry, it's hard to dry these out.
4. Let them cool.  Taste one.  Then stick them in the fridge for up to one week.

What do I do if I don't have a charcoal grill? 

Follow the recipe, but use an indirect cooking method on your gas grill.  If your gas grill has two burners, bring the grill up to a high temperature with both burners on.  Next, turn one burner off and place the thighs over the extinguished burner. If your gas grill has three burners, same technique, but turn off the middle burner and place the thighs in the middle.  I'm unaware of a gas grill with one burner, but if that is your situation...  get a new grill!

How do I create smoke on a gas grill?

Some gas grills have a smoker box.  If so... here is your big chance to use it.  If not, no problem. You'll need to make a "smoker pouch".  Sounds cool, right?  Take the chips you have been soaking and loosely roll them up in heavy duty tin foil.  Seal the foil roll and pinch the ends.  It should look just burrito but sealed up. Poke about 18 small holes in the top for smoke to escape.  Place the smoker pouch  directly on the lit burner (it should turned up on the highest setting) under the cooking grate.  If the grate fits over it, replace it.  If not, just leave it off for this recipe. The chips will not start to smoke quite as fast with this technique, so give it a few minutes to get going, before you put the thighs on.  The pouch should look like this:


Check out the video; these thighs came out great.  You'll notice they were on the small side.  I smoked them for 32 minutes which gave me an internal temperature of about 180 degrees.  That was a little too hot, but it's always better to be safe than sorry with chicken. They were still moist, and had some extra smoke flavor.  While too hot can work for thighs, I'd recommend you start checking yours at the 28-30 minute mark.